
Happy Thanksgiving, Y'All!
One of the things that I love to teach is the First Thanksgiving! I love teaching about the Wampanoag Tribe and the Pilgrims and how they lived in the 1600's. I would have never made it...bless. One of the things we discuss is how the Pilgrims made everything since there was no Target, Toys-R-Us, or Wal-Mart. Even the toys had to be made! So one thing we do in class is make a Pilgrim toy!
One of the things that I love to teach is the First Thanksgiving! I love teaching about the Wampanoag Tribe and the Pilgrims and how they lived in the 1600's. I would have never made it...bless. One of the things we discuss is how the Pilgrims made everything since there was no Target, Toys-R-Us, or Wal-Mart. Even the toys had to be made! So one thing we do in class is make a Pilgrim toy!
First, I show them several toys that the Pilgrims would have played with.


One of the Pilgrim toys that the Pilgrims played with is a cup and ball toss toy. It looked just like the toy below. You would toss the ball into the cup or at least try to. Let me tell you...it's not as easy as it looks. The idea is easy but doing it??? Geez! It would have taken a lot of practice!

So we make this cute Pilgrim toy with things we have around the room!!! Because that is what the Pilgrims would have done. They would have used what they had!

1. SUPPLIES
- one small plastic cup (just like the bathroom paper cups)
- a pencil
- two rubber bands
- a 4"x4" aluminum foil sheet (I use the aluminum pre-cut sheets by Reynolds Wrap and cut them into squares.)
- string (12 inches)
- washi tape (one piece)
2. Step One:
You will need to drill a hole in the bottom of the plastic cup. The hole needs to be as big as the pencil but you want it to be a tight fit. Then wrap a rubber band around the eraser end of a pencil. Stick the pencil through the hole so that the rubber band stops the end of the pencil.

3. Step Two:
Wrap the second rubber band around the pencil and slide it up to the bottom of the cup. This will help secure the cup so it isn't so wiggly!

Step Three: 1. You need two separate things for the ball and string. You will need about 12 inches of string and your four by four square of aluminum foil. 2. Lay the string onto the aluminum foil square. 3. Now fold the aluminum foil so that the string will be inside the foil. 4. Fold again. 5. NOW crumble up the foil into a ball. Your string will have a ball attached to the end. 6. Take the washi tape and attach the end of the string to the cup.

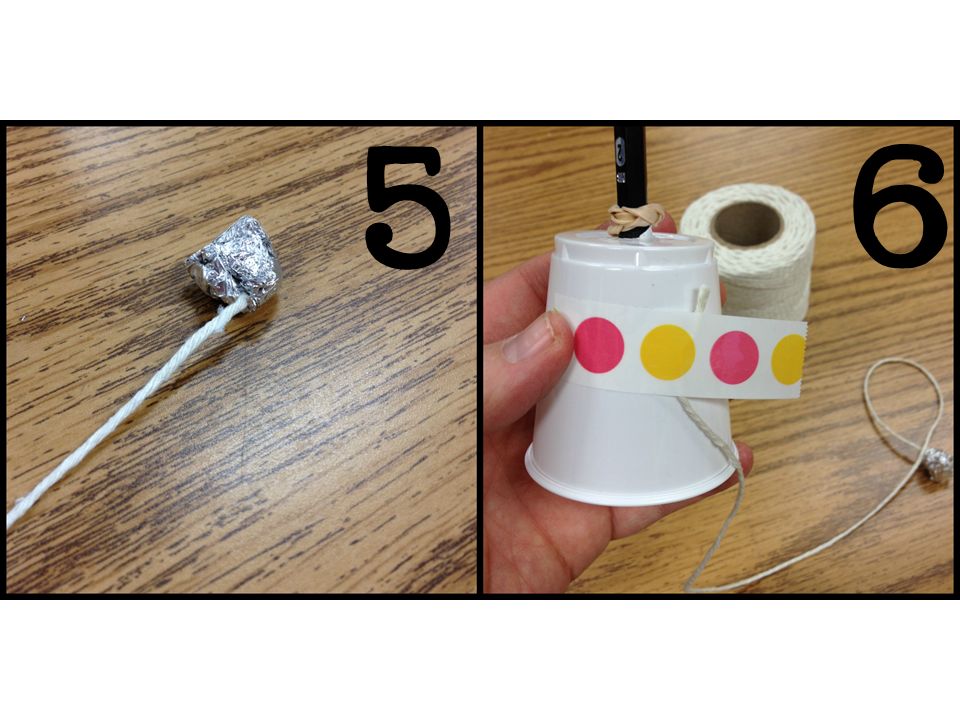
HUZZAH!! YOU DID IT!!
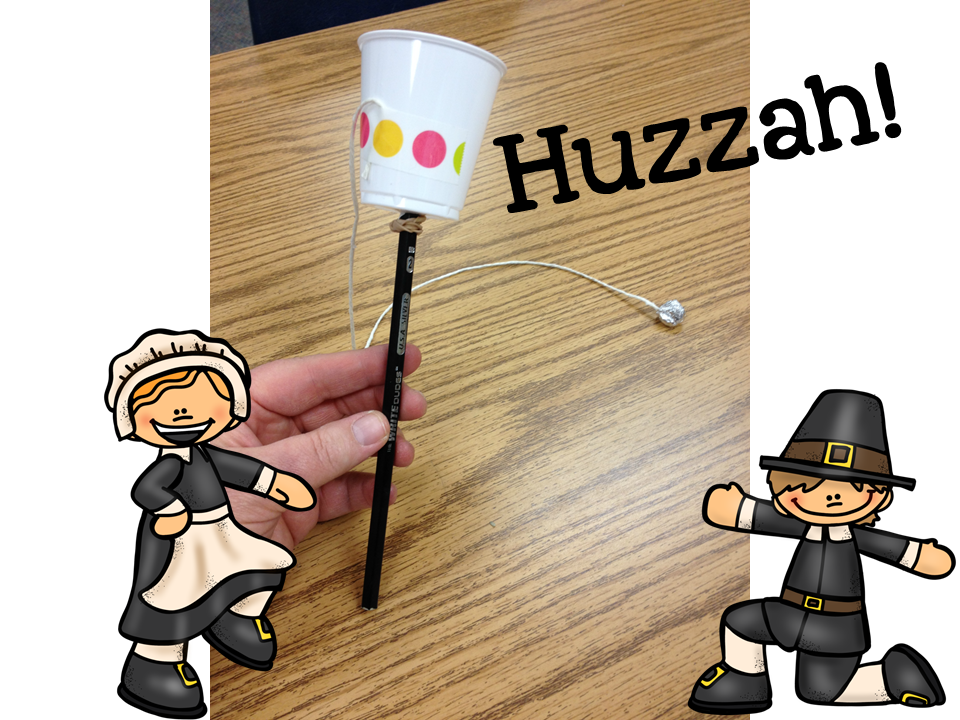
You just created a Pilgrim toy! Now it's time for the kids to practice!! They will love trying it over and over and YOU will love it because it authentic and it's a hands-on project!!
Here is a game that I love playing with my students. They do a "write around the room" activity that sorts Pilgrim chores with the chores they do at home today. Check it out at my store!

Have a great Thanksgiving!!

No comments:
Post a Comment