Home About Me My Classroom Freebies TeachersPayTeachers Facebook Pinterest BlogLovin Instagram Twitter Image Map

Monday, February 1, 2016

Lights and Shadows Again with Mrs. Grooms' Room


Hello sweet friends!

I hope that everyone has been keeping warm!!  We had TWO snow days!!  I am so proud because snow days are just not common down here.  Give us a snowflake though and we got a snow day, and you know that is true if you live in the South!


We started our Light and Shadows Unit a weeks ago before the snow and so now we are teaching at the speed of light to catch up. 


We have been talking about how light travels in a straight line and my students actually got to practice.  Seriously, it feels like magic in my room!  They are like "OOOH AAAH!" when the flashlights are on!   My students used a flashlight to shine on each object.  This experiment was so easy to do. Seriously, the hardest part was cutting out the holes in the cardboard pieces. Invest in some really good laser/flashlights because it will give you the direct ray of light that you need in your experiments.

Here they are practicing! 


Jennifer over at Rowdy in First Grade does a CUTE flashlight that says just that!  "Light travels in a straight line!"  You should totally check it out and it's FREE


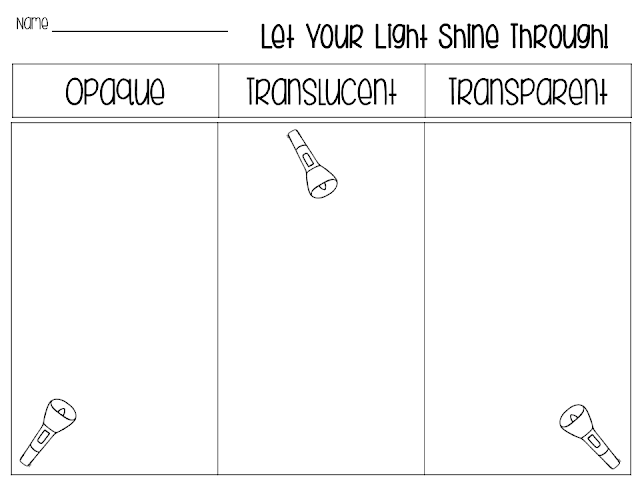
We also looked at objects that were made from materials that allowed light to pass through (transparent), we looked at some materials that allowed some light to travel through (translucent), and then we looked at some materials that would not allow any light to pass through (opaque).   


I was so proud because most of them did a fantastic job sorting all the materials! Here are some of their sorts...


Remember to give them a variety of objects but don't overwhelm them. Sometimes too much is just waaaay too much. 


My firsties really had a good discussion about objects like tubes and washers.  Some of my students felt like the washer and tube might be transparent because of the hole in the washer and the opening of the inside of the tube. This is fair because the hole is seemly part of the object. BUT they finally concluded that the hole and opening were not part of the material and that the material was opaque.  YEAH for my kiddies!  


My students then had to draw three objects in each column that were transparent, translucent, and opaque.  You can get your own copy free by just clicking on the photo! 


We are headed back into our light and shadow bins because we are going to be looking at what materials reflect light and what materials absorb light.  Again my students will get to use flashlights!! (They will be shouting WOO-HOO!) 

They will shine the light on materials to see if the light reflects or absorbs. 

 Materials that are shiny are great to use for reflective objects...anything metallic, shiny plastics, glass-like objects, or ceramics (small shiny tiles).  Materials that absorb light may be things like cardboard, wood, brick materials, or cloth.  We will be looking at most of these things and writing them down.

If you would like a copy of our record sheet, you can click on the picture below.


Now that's not all.  Seriously, I could talk for days on lights and shadows and about all the fun things that you can do with this unit. But for Groundhog's Day we will be talking about shadows!  I found this cute little activity over at Owls and Owls of Fun!!  Seriously, it is adorable and we will drawing this little guy's shadow! Thanks Owls and Owls of Fun!  We will also be predicting whether or not this little guy will see his shadow for 6 more weeks of winter. 


We will be using our own groundhog template to create a shadow. You can find it here or by clicking on the photo below. Just color and cut out and attache the groundhog to your construction paper.  

My students are going to cast a shadow with a flashlight of the paper groundhog onto white construction paper and color the shadow black.  The photo above shows they used black construction paper instead.   (I can't wait to see how they do!  I will definitely keep you updated!) 

\

Hoping you have a lovely February!!

Remember to stop by my store to grab some  free Valentines...they are a joke! 

 Literally.  : )

Just Follow Me by just clicking on the little star by my name!! 

post signature

Friday, January 1, 2016

I TEACH FIRST LINKY: LIGHT AND SHADOWS


Hey everyone!!!  I hope everyone is having a great start to the NEW YEAR!  It's always great to have a fresh start and a clean slate.  (Although, is it just me or does your new year always begin in August?)  : ) 

One of the things that I have been working on during my winter break is our lesson plans in science.  By the way, we have a brand new standard this year in science!!  (AND new standards are always exciting!) 
Drum roll...our new standard is...
LIGHTS AND SHADOWS!! 
I know...so fun...kind of...except...I have never taught light and shadows, EVER!!!   (Confession is good for the soul.)  I mean, I have always taught first grade standards, AND light and shadows have never been one of our standards until now.  

So I definitely had to share what I learned with my first grade friends!! YOU!  I have a lot of ideas, freebies, and links that you might be able to use, too.  This blog post is part one of two...so hang tight...shadows will be coming next week!!  

We are going to launch our unit with Oscar and the Moth by Geoff Waring.  He has a great collection of easy to understand books on science.  This particular book is about light and shadows.  Oscar the cat and his new friend the moth set out on a little journey to learn about shadows and light.  Isn't Oscar a cutie?  


Light is energy and it makes objects visible and without it, we cannot see anything! So we are going to first discuss the kinds of light that we find in our world and list them by two categories:  natural light and artificial light!  We are going to use an anchor chart just like The Lesson Plan Diva's chart.  Perfect! 


(You can check out her anchor chart by clicking on the photo above.)

We are also going to be looking at all the different types of lights in real life.  Would you include matches or a lighter? I am still debating. 


Since we don't have a real darkroom we are going to be using the restroom in our classroom.  Hysterical! Just the thought of being in the restroom is going to crack my little firsties up!  I am going to take them into the darkroom in groups cause my darkroom is tiny!  My students who are not in the darkroom group will be working on the activity sheet below.  You can find it free here!  


In the darkroom, I am hanging pictures of objects around the room.  I want my students to see them when we shine the flashlight around the darkroom to make them visible because of light.  We will discuss how light makes it possible for them to see the objects.  And when I turn the flashlight off, the objects are no longer visible.  (Yes...I totally expect some shrieks!!  Eesh...but in the name of science, right?)  In their science journals, they are going to record what they observed by drawing or writing what was visible in the darkroom.


If you would like a copy of the pictures that I am going to use in my bathroom darkroom, you can find them here!

We are also going to be looking at peep boxes.  Have you ever used peep boxes?  Kindergarten-Lessons.com is where I learned about peep boxes!!  You should totally check out the website because they have some great suggestions and ideas for light and shadows!  You can click here

They are not hard to make and you can easily make one for your students to see. Here is an example of one I made: 


Without light you can't see anything inside...


But with light, you can see lots of things on the inside!  I can't believe this box already had a peep hole!!!!!  


My students are going to record what they see inside the peep boxes in their science journals.  You can find the scene that I used for my peep box here.  It's so fun and exciting to look inside!!!  I will be working on another one this week and I will let you know how it goes!!  

What kind of activities do you do for light and shadows?  I am dying to know!!  

For the second part of our light and shadow unit, we will be talking about shadows and shadows will go along perfectly with Groundhog's Day.  

Yeah!! 
So come on back! 

I can't wait to show you what we are doing with shadows!

Hoping you have a great week back!!  


post signature

Wednesday, December 16, 2015

Secret Santa Blog Hop with The Elementary Entourage


Hey everyone!! 
I hope everyone is having an AWESOME holiday!!  I know I am and I can't wait to get started!! My sweet blogging friend from the Elementary Entourage...Brittany over at Tickled Pink in Primary started it all with this awesome Secret Santa gift!!  I cannot wait to show you!!  

First of all...my sweet hubs LOVES a package...I mean he LOVES a package!! He does not have the ability to NOT open it.  So when I got home my package was open...sorry Brittany.  BUT he did manage to leave the gift bag still in tact.  Ha!


Gift was still intact...I still cannot believe it was opened.


A card for me!!  (Did you all know my name is pronounced "Shauna" 
but spelled "Shana."?)


Um...yeah...definitely Friday night...this will be me folks!!!  Ha!!


NOW FOR MY AWESOME PRESENT....


AND I CAN'T WAIT TO FINISH MY FIRST PAGE...I will have to show you!!
Have you ever tried a grown-up coloring book?  


LOVE LOVE LOVE MY GIFT!!  Thank you so much, Brittany!!


That was so much fun!  I love hanging with my EE friends!!  Go give a shout out to Brittany over at Tinkled Pink in Primary!!  

You can head on over to my store and grab my Christmas in Italy for FREE! Check out my other ebooks!!  I was a world traveler this month with my students! You can be too! 


Wednesday, December 2, 2015

I TEACH FIRST: BECAUSE GINGERBREAD HOUSES ARE FUN!!


Hey y'all!  How are my sweet friends? 

I have joined I TEACH FIRST's monthly linky!!  We are here to share our ideas and tips on teaching! If you like what you see in this blog post, please follow me and follow all of my sweet blog buddies!  We would love for your to join us every month! 

I love the holidays every year.  I celebrate with my kids until I am "stick a fork in me...I am done!"  Since we celebrate the holidays in Germany, one of the craftivities that we do is gingerbread houses.  I know what you are thinking...WHY??  

Because gingerbread houses are fun!!  

It is truly pure joy for my firsties to decorate gingerbread houses. I do think they hum with merriment and joy. 


Now, I know it sounds like a crazy sugar-filled train-wreck BUT after 14 years of devious preventive planning...I think I have almost mastered the art of making gingerbread houses.  Ummm...probably not! 

However...I am going to tell you everything I know....all of my secrets...in order from beginning to end.

My Gingerbread House Monologue
These are my exact words to my students right before we make our houses...
  
"We are not making food to eat.  This is a decoration to put on your table at home. It is not dinner. It is not a snack. If you sneak and eat things off of this gingerbread house, please do not ever tell me and it's probably not a good idea to tell your mother." 

But then they do. 

(Bleh.)  :P


Gingerbread House Making Tips!!

Tip One:  Students will need to save their milk cartons from the cafeteria which is really exciting for some reason?  :/  I am not sure why.  This is the base of the gingerbread house.  Doing it without a base can be frustrating and your gingerbread house breaks very easily. 

Tip Two:  Note to self:  You will need to do this at least three or four days before you actually decorate your gingerbread houses:  You must wash the cartons with soap and let them dry completely.  I even disinfect them with disinfectant.

Tip Three: Also, put plastic disposable plates on your purchase list. Plastic disposable plates work best as the base of the gingerbread house.  Let me say that again...buy plastic plates...not styrofoam or paper.  You will be glad you did. 

Tip Four:  Also...you will need a hot glue gun, glue sticks, and possibly band-aids as well.  I always seem to walk away with a burn probably because my glue gun is called the Beast. 


Base and Carton Assembly

Step One:  After you wash and dry the milk cartons, have your cartons and plates ready.  Plug that glue gun in and make sure you have plenty of glue sticks!   Now, you are ready to build some houses!  


Step Two:  The lips of the carton will need to be glued together.  To do that...you just need a small line of hot glue on the opening of the carton.  Press together carefully.    


No burns...yet.  

Step Three:  Now you will glue the base of the bottom of the milk carton to the plastic plate. 


Awesome hold! 


                  I glued the carton right smack in the middle of the plate.


I think it took me about 20 minutes to do 16 of my students gingerbread houses.   Yeah! 


Building the House!


 Now for the fun part!  Every house takes 6 graham cracker halves or three long crackers.  I use hot glue to glue the crackers to the milk carton.  Yes....hot glue.  I know...but remember it is a decoration. 

(Long ago, I had the students "glue" their graham crackers to their cartons with icing.  But the crackers never even made it out my classroom door.  They would actually fall right off the carton and the entire thing would end up in the trash.)  
#FAIL

Here are the walls of the house being glued on!   

FIRST:


Notice the graham cracker are glued on near the top of the carton leaving space at the bottom.  This actually works better than gluing them to the bottom and leaving a space at the top.  Students can easily disguise the bottom with icing and candies.  

Next...


This part is a bit tricky.  You want to put hot glue on the edge of the carton and the top of the wall to attach the roof.  Can you see the dripping glue on the edges? You will want to be pretty generous here because it is an awkward position for the crackers but 80 percent of the time the crackers stay. Now carefully place your graham cracker halves.  


And the hard part is over! 

It probably took me about an hour to do my 16 houses.  That seems like a lot of time but you will be sooo glad you did.  ;)


More Gingerbread House Building Tips

 I have parents donate candies, cereals, chocolate chips, and marshmallows to decorate the house.  It is a big help to you and usually it's easy to get items donated because the students are way excited!  Here is the sheet we use! 

I put everything on a single plate for each group of three or four students and I give them one tub of white icing with a butter knife.  

Now it is go time.  And they do...for all of the trouble and craziness and prepared-ness???  It is actually a quiet time for the students.  They are focused and on task AND they are quietly eating the icing.  

Yes...they totally do it.  It is gross but you probably will not know because they can be quite sneaky, or you may choose not to know.  The latter is usually me.   


 I stay busy cleaning up and getting grocery/wally world bags ready.  Yep...just the good ol' plastic grocery bag.  It ties easily and makes the trip home a little easier for everyone.

Especially, for the houses that look like Mount Crumpet.  


 Clean-up is easy.  Once students are out the door, throw everything away.  Leave no sugar behind.  Wash the tables.  Disinfect with Lysol.  And you are finished and possibly the best gingerbread construction supervisor EVER! 


Here is the last bit of advice that I can give you.  Decorate the gingerbread houses, 30 to 45 minutes before the students go home.  You can use it as an incentive AND you really don't have any of the sugar craziness. <-- awesome perk.  


Enjoy!  


post signature


Friday, October 16, 2015

Tricks and Treats Blog Hop


Trick or Treat!!!!  I am so excited to be hanging with you and The Elementary Entourage!  I sooo love Halloween.  You can be funny and crazy and eat lots of yummy chocolate and no one really judges you...uhhh hummm...unless you are in a costume contest. Haha!  : ) 

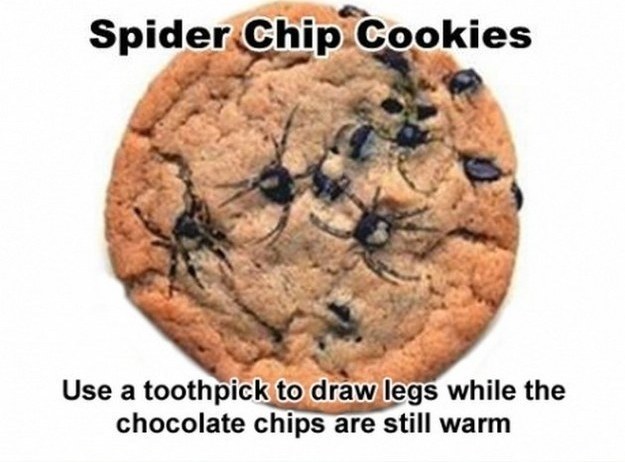
Randomness: LOOK at these "Halloween" cookies!!  Perfect if you are learning about spiders!!!


We are thrilled to give you some sneaky teacher tricks and a yummy treat, AND we hope you join us. The more? The scarier merrier!

I'm going to tell you about one trick that has helped me the most and if you are TYPE B like me...then you will totally get it.  My time management is not really my thing.  I know...I know. All teachers are supposed to be "spot on." But sometimes I am not.  I get lost in our lesson or our activity.  Or we innocently head into another direction because of our activity.  Sigh...

You know, it's not on purpose, and the job always gets done.  But sometimes you just have to be on time. 

So...my trick this year has been to schedule every scheduled subject, and event into my phone.  I know it's not "acceptable" in all classes and schools to use your phone...BUT IT HAS HELPED ME SO MUCH!  It's not just a trick...it's been a treat!!!  Take a look at how I have set it up...


I keep my phone in a small hidden place and the ring is soft...almost like soft bells ringing.  My kids know a transition is happening and I DO, TOO!  I just simply press "OK" and we move on.  If you haven't set your phone up...try it!! YOU WILL LOVE IT! 

(I know my sweet Type A friends are like "Ummm...Shana? Hello?")

Now...here is a treat just for you!! Just click here or on the picture above. Here are some of my L Ending Puzzles! These puzzles are wild!! Okay...not really wild!!  But they will make a great center to help your little ones learn!!  Please enjoy!  They will be free until November 1, 2015!!   Hoping you have a great and awesome Halloween!! 


Tuesday, September 1, 2015

Back to School Bash


Hey everyone!!   I hope you having a great start to the new year.  I know things are always a little crazy at the beginning of a new year. (People, I am feeling a little crazy myself!)  You're excited and nervous and your students are too!! 

And of course, you want everything to be just perfect!!   All of us at The Elementary Entourage are here to make your life a little bit easier. 

I have a couple of things to make your life easier for those first few weeks! 

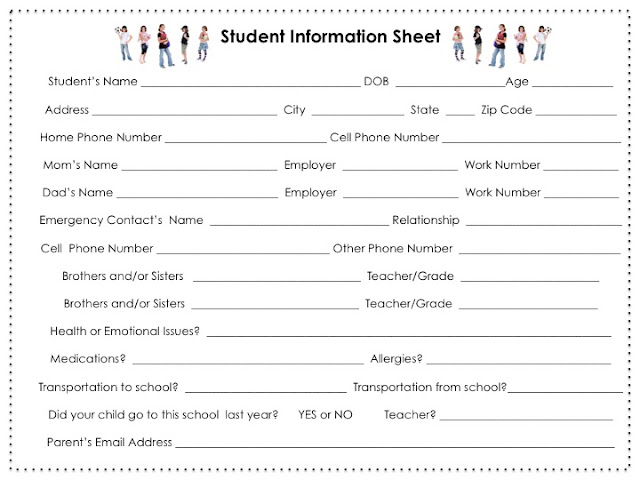
Here are some of my favorite student information sheets!
Just click on the photo below.


You can also grab my Birthday Coupons!  They are great for those birthday bags or birthday treats! 


I hope you can use these freebies, cause I LOVE using them in my classroom.  I know they make things a little bit easier for me and a lot less crazy! 


Head on back to The Elementary Entourage to see what's happening next!!